
How To Get Started With Shopify?
Are you ready to learn how to set up your Shopify store? Let’s get started!
Shopify is a fantastic platform to launch your business and generate significant revenue. Let’s suppose that you are not a professional web designer; in that case, Shopify offers all the resources required to create your online company. In this blog we are going to discuss some crucial pieces of advice for how to get started with Shopify! However, we are aware that mastering every function of Shopify might still be a little challenging.
Invest in a relevant domain to expand your business. Select a theme that works well for your company. Organize the website yourself or get help from an expert. Make web pages with FAQs, product descriptions, CTA buttons, and appropriate graphics.
Lastly, launch your internet store. Ha! Many things to keep in mind, surely? We realize it seems intimidating, so don’t panic! We’ll go over them in detail now! There is plenty to discuss, so let’s get going with how to get started with Shopify?
Table of Contents
How to Use Shopify?
The interesting part is here! Here are some quick suggestions and strategies to help you launch your Shopify business quickly. Now let’s move!
Create an Account with Shopify
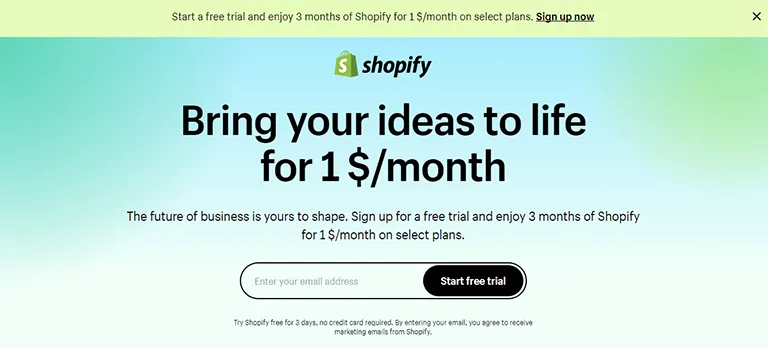
You must first register for a Shopify account before we can proceed. You can begin using it with the 14-day free trial that it offers. Give your email address and store name. Along with that you’ll need to set the name of your store as well as your address, complete with zip code.
Explore the Shopify Admin Screen
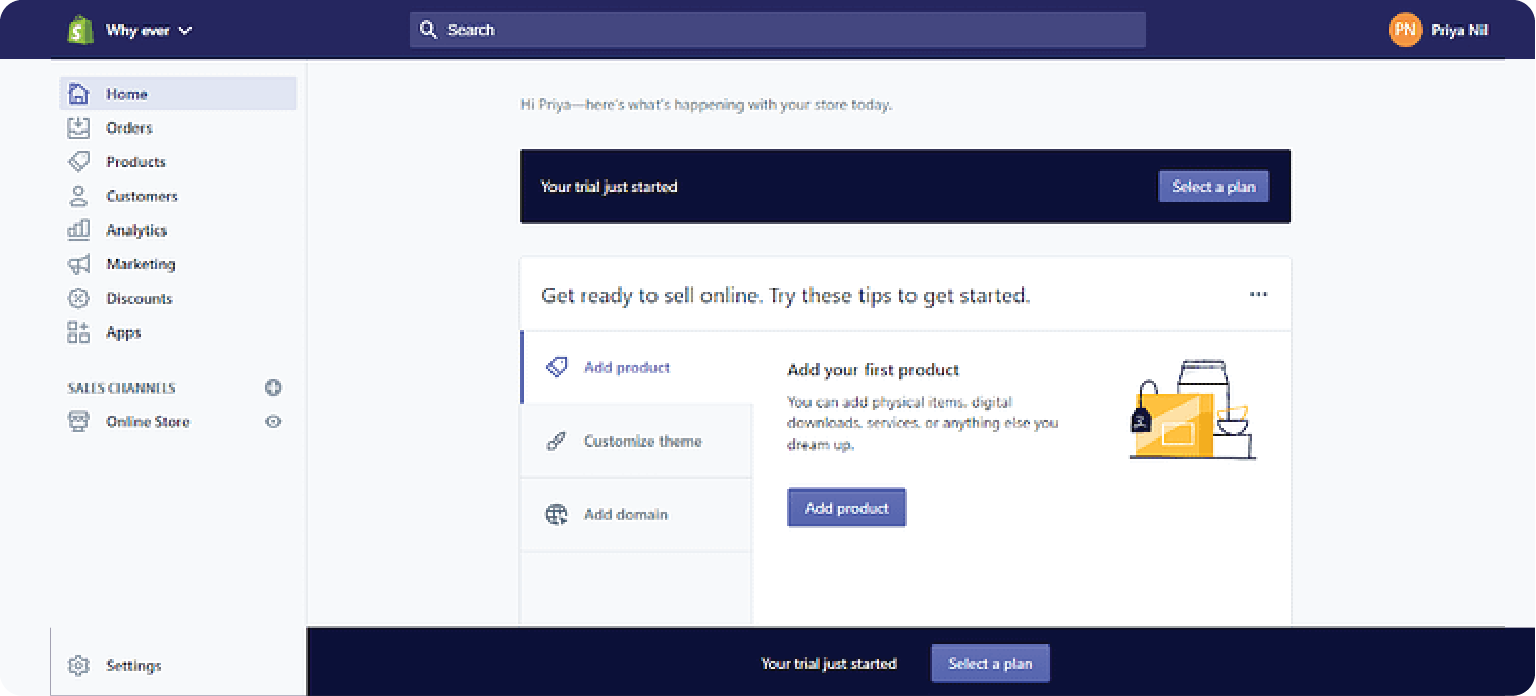
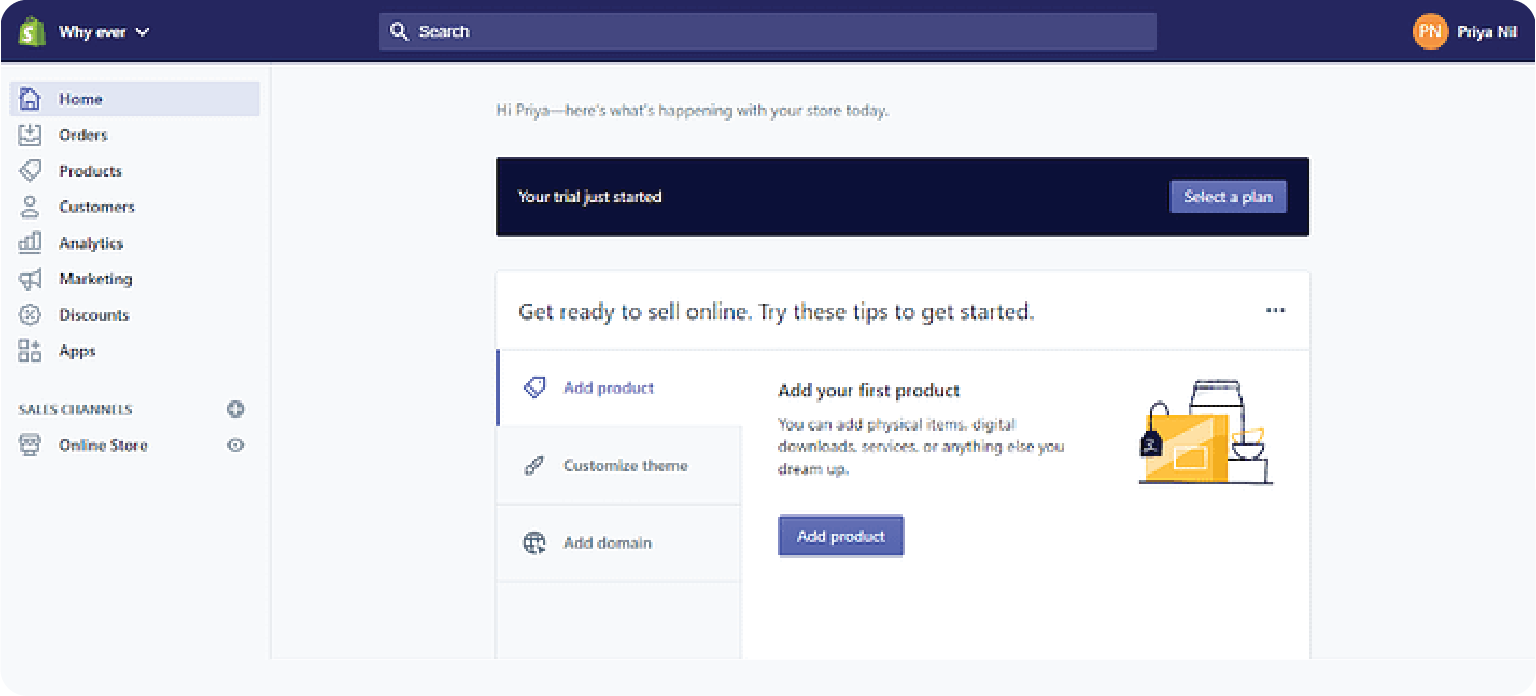
After completing the information, click Enter my store to open your store’s admin screen.
This screen is where a lot of the action in this Shopify tutorial happens, and here is how it looks.
As you can see, you can add products, configure payments, shipping, and statistics, select a theme, and personalize your store all from this page. That takes a lot of selecting and filling out, but if you get it correctly, it should function well in the long run.
Add Your Products
Adding the goods, you plan to sell on your online store is the next stage in this Shopify tutorial. Proceed to Products → All Products → Add Products to accomplish this.
This is where you enter all product-related information that you would like to provide to your clients. You can describe the product in great detail and upload photographs of it.
Adding information with SEO in mind will make it easier for your viewers to find the products. Click Edit website SEO under the Search Engine listing preview section, then provide a meaningful title for the link that will appear in the search engine results. You will be able to change the URL, add a description using keywords, and configure URL redirects.
When it comes to products, you have other alternatives as well. You can make duplicate product pages, add options to make variants, and edit them further to modify specifics. The bulk editor allows you to edit products in bulk as well.
The product availability area allows you to select the channels via which the products will be sold. You can tag things under the Organization section to make it easier for your consumers to find what they’re looking for. Each product can have up to 250 tags added to it, separated by commas.
Set Up a Gift Card
You don’t get paid when you make a free gift card; instead, you generate a code that you email to the customer. The value of the gift card is up to you, and the recipient can use it for other purchases made at your store.
Since gift cards are considered currency, only the recipient can see the entire code after it has been sent. When creating the card, note the gift card code if you need to know it. The final four digits of the code are the only ones you can see later.
Steps:
- Go to Products > Gift cards in your Shopify admin.
- To create a gift card, click Create.
- To create a gift card, click Create.
- Put the card’s value in the Initial value field.
- To create or find a customer, put their name, phone number, or email address in the Customer field.
- To receive the gift card code via email or SMS, the customer needs to provide either a phone number or an email address. The gift card will be emailed to the customer if they supply both.
Optional:
Choose Set expiration date from the Expiration date box and enter a date if you would like the gift card to expire. Find out more about gift card settings and expiration, and make sure you abide by the gift card regulations in your nation.
- Add an optional internal note for your records here. The customer cannot see the note, but you can view it when you view the gift card in your Shopify admin.
- To see a preview of how your consumer will see the gift card email, optionally click Preview email.
- Press Save.
- To send a gift card, click.
Take one of the following actions:
- Click Send email if the customer has provided an email address.
- Click Send SMS if the customer just provides a phone number.
Create a Collection
To make it easier for customers to search and review, you should organize your products into collections, such as special collections, seasonal collections, or collections based on the categories of your products.
Configure Shipping Taxes
Before you can go live with your store, more options exist for you to choose from. Follow along with this Shopify guide to succeed. From the Settings section of your store, you can access each of these options.
a) General: In this section, you must enter some basic details about your company.
b) Locations: These aid in inventory control, order fulfillment, and product sales. Storefronts can be located in retail stores, warehouses, drop shippers, or anywhere else that deals with inventory, including inventory management apps. The plan that you select will determine how many sites you may set up.
c) Shipping: Prior to closing a deal, you must determine which delivery options are most appropriate for your company. After that, you may let your clients select any of these options when they check out. On the Shipping tab of your Shopify Admin, you will see the shipping zone and prices applicable to the areas and nations you ship to. Additionally, Shopify provides shipping from US and Canadian locations. This enables you to buy shipping labels that expedite delivery and provide pricing to your clients. The packages can be easily dropped off at any post office.
When determining the shipping charges, you should assess the product’s weight, packing, and actual delivery expenses. You can reduce shipping costs by almost half compared to retail rates if you use Shopify to order shipping labels from well-known carriers in the USA and Canada.
A common reason why shoppers leave their carts empty at checkout is unexpected shipping costs. You can address this by providing free delivery based on the product’s price, weight, or coupon codes. At checkout, you can see computed pricing from the carriers if you have one of the higher plans.
d) Checkout: Orders are accepted using the safe Shopify checkout process on this page. Theme settings allow you to change the checkout page’s look and design. Allowing customers to create customer accounts will enable you to store and pre-fill password-protected information, such as address, email, and order history, at the point of checkout.
Set Up Payment
a) Accepting Payments: For your consumers’ convenience, Shopify allows their customers to enable a variety of payment methods. You should consider your customers and your own location while selecting payment gateways. When choosing your payment provider, you should also take transaction fees, accepted card types, and onsite vs remote checkout into account.
Regarding credit card payments, you have a selection of more than 100 third-party suppliers to pick from or use Shopify Payments.
PayPal is the default payment source; other alternatives include Apple Pay, Amazon Pay, and PayPal for non-credit card transactions. Certain payment providers now offer accelerated checkout buttons to make it easier for repeat customers to finish their purchases more quickly.
To choose the currency for your store, visit Settings → General → Standards and formats → Change formatting.
b) Taxes: The majority of nations have laws requiring you to collect and send in sales tax to the government. Shopify handles the majority of generic tax calculations in numerous tax countries, making this simple for you. Shopify utilizes preset rates, which you must verify or change. There are a number of reports available to assist you in gathering data to submit to your accountant or to file government taxes.
Choose and Customize Your Theme
Shopify themes enable you to give your store a unique appearance and an impressive touch. Not all Shopify stores have the same aesthetic. You can choose a free or premium theme to replace the default one that is installed on the Themes tab of your admin.
Consider spending a few minutes viewing demos, previews, and user reviews of your theme before settling on one. Select Online Store → Free Theme after that.
The theme will be added to your store after you click the Add button.
You can maintain seasonal variations of your published theme and test and preview updates. You can add many themes to your Shopify account, depending on the package you select. One theme, though, may only be published at a time. I’m going with Minimal, but you’re free to choose another option.
Everything you need to have an impact is included in these themes. With complete Shopify support, all themes are guaranteed to function flawlessly. In case you were unaware, various marketplaces and theme companies provide Shopify themes created by outside parties.
You will be able to access the documentation for your theme, modify the code, alter the content, upload images, add free stock photos, and more. If you’re not good at coding and you want to make significant modifications that require HTML or CSS, you might want to get assistance from “Shopify Experts.”
Test Your Store
Testing your store before accepting orders is a smart idea at this point. You may assure that your checkout procedure and the settings for order processing, inventory, shipping, notifications, and taxes are all operating as you intended by using the Bogus gateway.
Deactivate any payment providers you have enabled by going to Settings → Payment providers. Click Accept credit cards, then select Add a provider, then select Third party credit card provider, then select Provider, then Other, then Bogus Gateway, Continue, and finally activate the gateway.
Once you visit your store and place an order like any other regular customer, you’ll be able to tell if everything went according to plan.
Launch Your Store
Once you’ve reviewed the final few components of your website, such as the shipping and delivery details, customer alerts, business locations, general information, and taxes. Your webpage is prepared for launch!
Add a Custom Domain Name
Adding your domain to Shopify is the final step before launching your store. You’ll need a domain name, or your website address, just as you would for any other website so that users and search engines can find you. You may also discover a ready-made Shopify solution here.
Shopify gives a default domain, www.your-store-name.myshopify.com, to assist you in setting up a store. However, if you want to rank higher in searches or improve brand recall in the eyes of your customers, you could prefer a more personalized URL like www.your-store-name.com. In that scenario, you have the option of utilizing an existing custom domain or purchasing one from Shopify.
Shopify charges $11 a year for custom domains, which are configured for you automatically. You also get to keep the domain name if you decide to leave the Shopify platform. Shopify will forward an infinite amount of emails to your email address even though the domain plan does not include any email accounts.
If you already have a custom domain, you can use these procedures to link it to Shopify or transfer it to Shopify.
Common Mistakes When Starting a Shopify Store
How to get started with Shopify? Is a general question arising in along with the resolutions so, let’s examine some common blunders made by business owners while creating a new Shopify store.
Inconsistency in Theme Color
When designing Shopify stores, the theme color serves as a brand’s initial impression; a lack of consistency in this hue might result in a disjointed and confused layout. It might be challenging for visitors to distinguish between crucial parts on a page when colors are utilized inconsistently.
Consistency in color scheme enhances a store’s aesthetic appeal and contributes to the development of brand identification and trustworthiness. As a result, when personalizing the appearance of your store, you must take color into account.
Make Use of Suboptimal Images
The overall user experience is harmed when Shopify stores are created with visually impaired content. Elevated bounce rates and disgruntled clients might be caused by large image sizes and slow loading times.
Before uploading photos to Shopify businesses, it’s critical to optimize them for the platform to enhance website speed and guarantee a flawless buying experience. For this reason, you should have excellent photos and videos of your products ready before putting them in your stores.
Ignoring Mobile Users
Choosing a theme that isn’t mobile responsive can have a negative impact on how your website feels to use overall. This could make it difficult for users visiting your website from mobile devices to navigate or read content, which would aggravate them and increase bounce rates. In order to guarantee a smooth and continuous experience for every user, it is essential to select a theme that is suited for all screen sizes.
FAQ’s
Yes, Shopify is considered beginner-friendly. It has a simple interface and setup process and offers resources and support for those new to e-commerce. Shopify’s website creator uses drag-and-drop functionality, so anyone can build a website without needing additional skills.
Yes, you can integrate third-party apps with Shopify to improve the functionality of your online store, enhance the customer experience, and automate tasks. You can find free and paid apps in the Shopify App Store. Most apps for Shopify stores are built by third-party developers, not by Shopify.
Yes, you can customize the look of your Shopify store. Shopify themes come with predefined styles and layouts, but you can use the theme editor in your Shopify admin to customize them to suit your brand. You can preview your theme, add, remove, edit, and rearrange content, and change some of the overarching settings that govern how your theme looks and works.
Final Thoughts
How to get started with Shopify? This question arises in the minds of many. It doesn’t have to be difficult or time-consuming to create a Shopify store. In just ten minutes, you can design a visually stunning and user-friendly website if you have the necessary tools and resources. You can choose the appropriate apps, personalize the look and feel of your business, and set up shipping and payment options that satisfy your consumers by following the instructions provided in this blog post. To increase traffic and revenue, you may also add products, create pages, and optimize your store for search engines. Remember, a well-designed Shopify store can make your company stand out from rivals and win over potential clients. So, don’t hesitate to move forward and begin creating the eCommerce website of your desires right now.ITVerticals Services

How to Create a Landing Page That Actually Converts in 2026
Adam Romy
June 1, 2026

Top 10 SEM/PPC Strategies for Better ROI in 2026
Adam Romy
May 25, 2026

Mobile App Development Cost: What You Need to Know in 2026
Adam Romy
May 18, 2026

Top 10 Instagram marketing strategies that work in 2026
John Costa
May 11, 2026
Proven Local SEO Strategies That Work in 2026
Adam Romy
June 8, 2026
How to Create a Landing Page That Actually Converts in 2026
Adam Romy
June 1, 2026
Top 10 SEM/PPC Strategies for Better ROI in 2026
Adam Romy
May 25, 2026
Mobile App Development Cost: What You Need to Know in 2026
Adam Romy
May 18, 2026
Top 10 Instagram marketing strategies that work in 2026
John Costa
May 11, 2026
