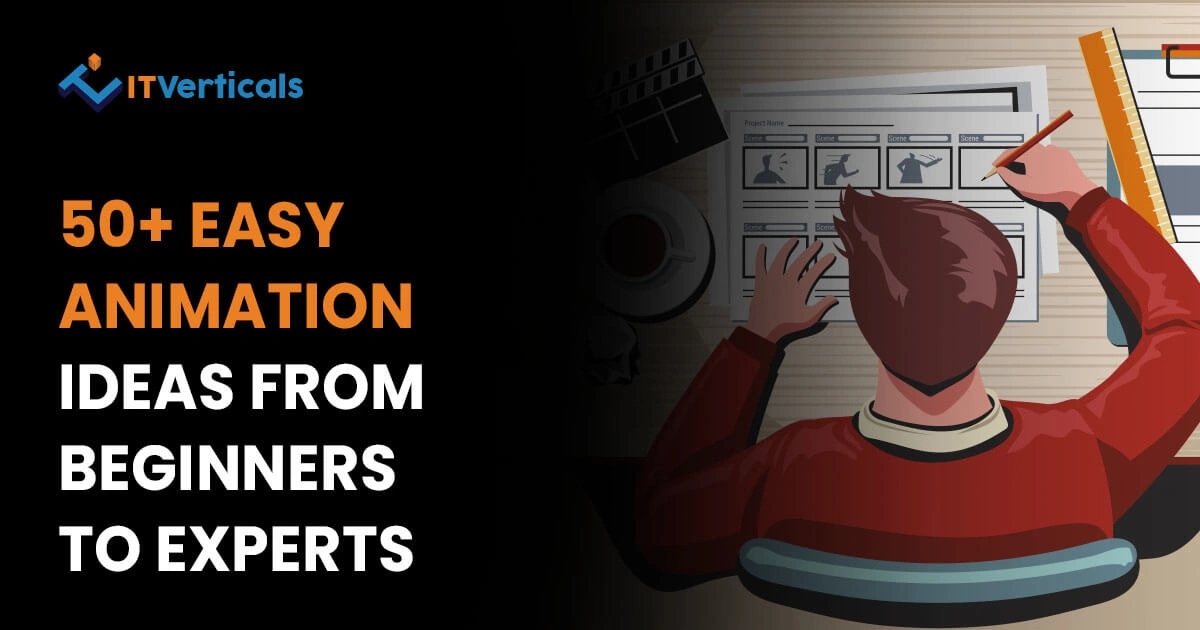
50+ Easy Animation Ideas from Beginners to Experts
Most animators don’t fail by starting off with the wrong software. They fail because they start animating complex scenes before they can land a ball convincingly. Animation, like any other skill, requires you to start with the basics. And the order at which you practice animation is more important than how many hours you spend animating. These animation ideas for beginners follow that order on purpose, from a single bounce up to short animation ideas that hold a full story.
This list has 50+ easy animation ideas sorted by skill level, from absolute beginner exercises to expert-level challenges that will push your timing and physics instincts. The ideas at Level 1 teach you one animation principle. By Level 4, you’ll implement 5 at once. And the 1-minute animation ideas are where you actually start telling stories using animation. Most are 2d animation ideas you can draw flat, but the same principles carry into 3d animation ideas once you switch tools.
Every animation idea below will build skills you’ll carry into everything you make afterwards. So, whether you just installed your first animation tool or are comfortable with the frame-by-frame animation, this guide has a starting point for you.
Table of Contents
Easy animation ideas: Level 1 (Beginner)
These are the exercises every animator starts with for a reason. The focus is on a single principle before you move on to another. The goal here is not to impress anyone. It is to understand how movement feels in animation. Treat these as your core character animation ideas: each one isolates a single principle you’ll reuse everywhere.
1. Flipbook animation
Grab a sticky note pad and draw in the bottom corner. Flip fast. That’s animation. A flipbook strips away every tool, timeline, and software decision and forces you to focus on the only thing that actually matters: does the movement look right? Start with something small, a circle that grows, a stick figure that waves. Get 10 frames to feel like motion. Once you can make that happen on paper, you understand timing better than most people who’ve been animating in software for months. Flipbook animation ideas are the cheapest way in, no software required. The same instinct powers stop motion animation ideas, where you nudge a real object frame by frame and shoot each pose. People also file those under stop animation ideas, but the timing lesson is identical.

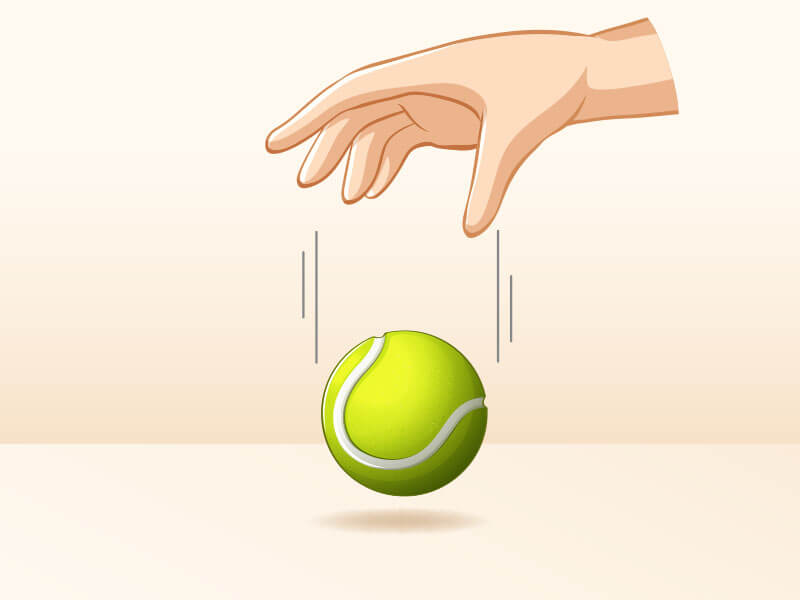
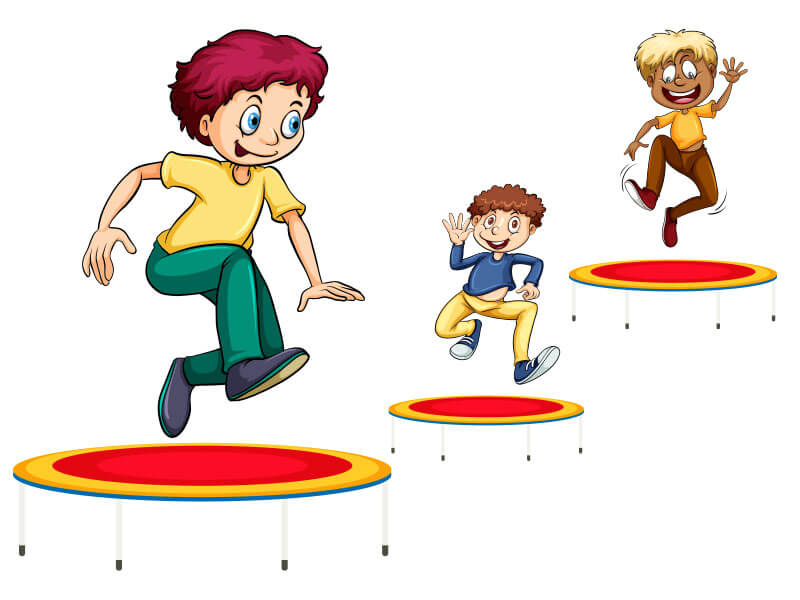
2. Bouncing ball
This is the first exercise in almost every animation school on the planet, including programs at CalArts and Ringling College of Art and Design. The reason is squash and stretch. A ball gets small or compresses when it hits the ground. And it elongates when in reaches mid air. Without that deformation it looks like a rock falling instead of a ball bouncing. They point that most beginners miss is that the ball slows down as it reaches the top arc and paces during the drop. Get that slow-in and slow-out right, and the bounce will read as natural even before you touch the squash.
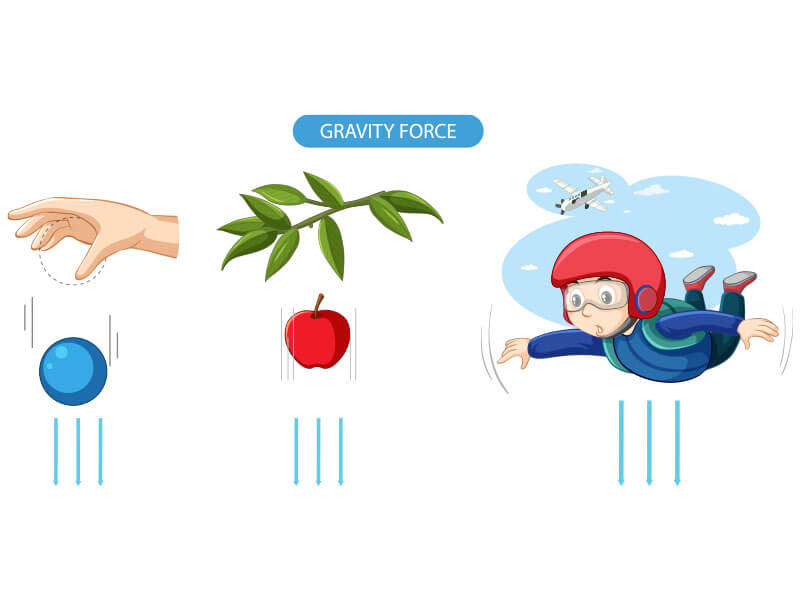
3. Object falling
Drop a box, a coin, anything. The point is to animate gravity correctly. Objects don’t drop at a constant speed. They accelerate the more they go down. During practice, your first frames in the tool should be close together to show slow initial movement. And the later frames should spread apart to show fast descent. Add a very slight rotation as it falls. A perfectly vertical fall with zero tilt looks wrong to the human eye. We instinctively expect things to tumble slightly. One small angular shift and the whole thing reads better immediately.
4. Jumping character
There are 3 distinct moments in a jump. Frist is the anticipation (crouch). The second is the air (arc). And the third is the landing (impact). Most animators starting rush the crouch. Spend almost as much screen time on the crouch as on the jump itself; the anticipation is what makes the audience believe the jump is coming. The landing should include a small compression on impact. Skip that, and the character lands like they weigh nothing. This exercise will teach you more about anticipation than any tutorial.
5. Smiling face
Facial expression animation is a skill on its own. And this is the cleanest starting point for animation. The corners of the mouth lift first, then the cheeks go up, finally the eyes show motion. If everything moves at the same time in the animation it will look mechanical. Add a slight squint as the smile peaks; real smiles reach the eyes. Try animating a face going from neutral to a full smile in 10 to 15 frames. Then try doing it in 6. See how much slower or faster changes the emotional read completely.


6. Falling leaf
A leaf does not go down in a linear motion. It goes sideways, catches some air, circles in mid air, pauses, and then continues to fall. This exercise teaches secondary motion and the idea that organic things never move in predictable lines. The path of a falling leaf is irregular, and that irregularity is exactly what makes it look real. Try giving your leaf 3 to 4 direction changes before it hits the ground. Then vary the speed between each change. This is one of those easy animation ideas that looks simple and quietly teaches you a lot.
7. Moving clouds
Clouds are a background motion exercise, but they introduce one of the most important principles in scene composition: parallax. Clouds closer to the viewer should move faster than clouds in the far background. If everything moves at the same speed, the scene looks flat. Try 2 layers of clouds: one moving at a normal pace and one crawling slowly behind it. The depth you get from that single change is immediate and striking, even in a very basic scene.


8. Opening book
A book cover doesn’t open in a straight line. It arcs. Everything that rotates on a hinge follows a curved path instead of a linear one. This animation will teach you about arcing motion. This is the same motion which applies to arms, legs, doors, and almost anything that pivots. When animating, keep the spine of the book locked in place as the cover swings open. The pages should follow the cover with a slight delay. That offset between the cover and pages is your first taste of overlapping action.
9. Blinking eyes
Clouds are a background motion exercise, but they introduce one of the most important principles in scene composition: parallax. Clouds closer to the viewer should move faster than clouds in the far background. If everything moves at the same speed, the scene looks flat. Try 2 layers of clouds: one moving at a normal pace and one crawling slowly behind it. The depth you get from that single change is immediate and striking, even in a very basic scene.

10. Character thinking
A thinking character shouldn’t move much. That’s the lesson. A slight head tilt, one slow eye movement toward the upper corner, maybe a lip purse. Three small movements are already too many. Pick one and commit to it. Stillness with micro-movement reads as thought. Frantic movement reads as confusion. This exercise teaches restraint, which is one of the hardest things for new animators to learn. Less is almost always more when you’re trying to show a character’s internal state.
Simple animation ideas: Level 2 (Intermediate)
Level 2 is where exercises stop being isolated and start combining principles. You’ll be managing anticipation alongside secondary motion, or squash alongside follow-through. The difficulty is not the complexity of the animation. Tt’s in keeping multiple variables consistent at same time. If Level 1 was learning individual words, Level 2 is writing short sentences. Most are 2d animation ideas, but the principles transfer to any medium.
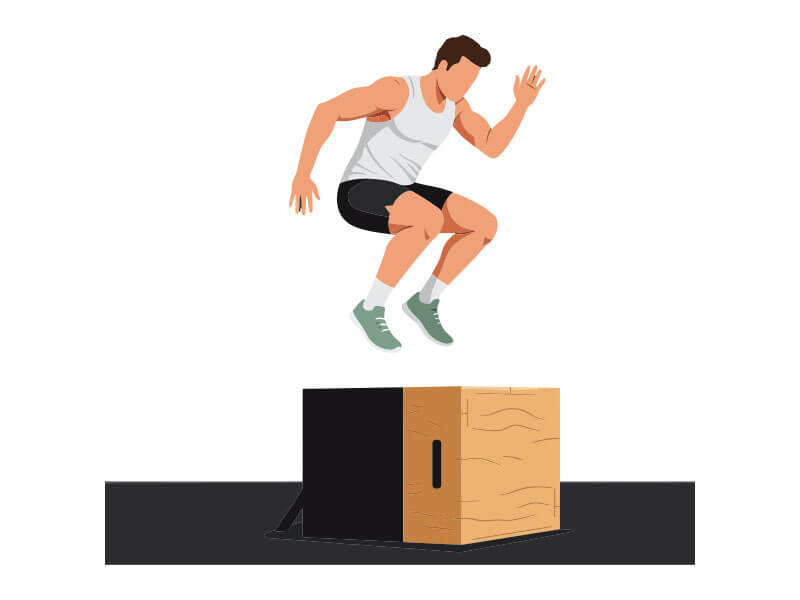
1. Character jumping over a box
This builds directly on the basic jump exercise, but now you have a specific obstacle shaping the arc. The character can’t just go up and come down; they have to clear the box, which changes the peak of the arc, the angle of the landing, and the required anticipation. The box also gives the viewer a size reference, so your physics need to be believable. If the character clears a box that’s chest-height with the same arc as a step-over, it reads wrong immediately.

2. Sneezing animation
A sneeze is fast, involuntary, and physical movement. The body doesn’t just react. It leads into the reaction with an inhale-and-pause that telegraphs what’s coming. The idea is to animate a slight backward lean and inhale before the head moves forward. Then pay close attention to drag. The hair and any loose clothing continue forward after the head has already snapped back. That delay between the primary body action and the secondary clothing movement is called drag, and this exercise is a clean way to see it in action.
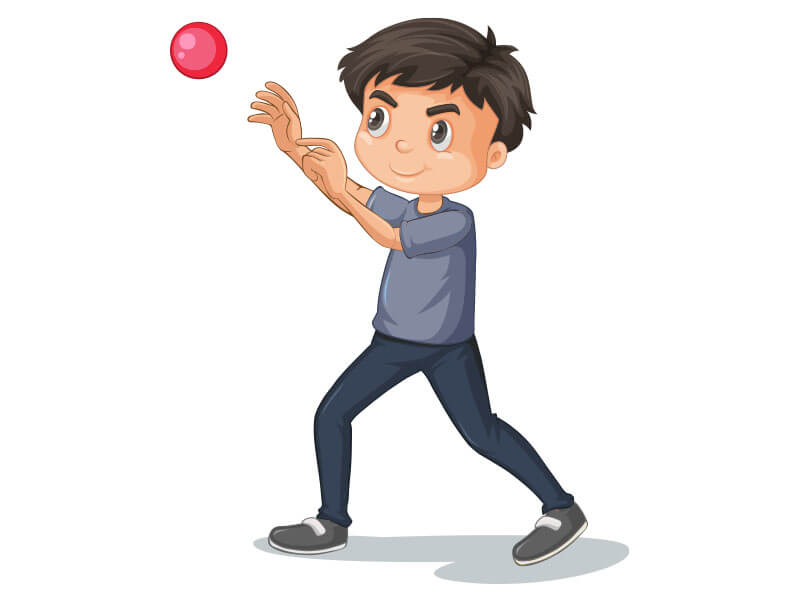
3. Throwing a ball
The throw has 3 phases: wind-up, release, and follow-through. The wind-up is anticipation (the arm swings back before going forward). The release is the fastest point in the whole motion. And the follow-through should carry the arm much farther than most beginners expect, often past the centerline of the body. If the arm stops at the point of release, the whole throw looks stiff. Weight also matters here: a heavier ball slows the wind-up and exaggerates the arm’s effort. A lighter ball moves faster with less physical struggle.

4. Opening a door
A door rotates on a fixed axis. The hinge stays locked while the rest of the door swings through an arc. Beginners often animate the whole door moving, which makes it look unmoored. Lock the hinge point and let the door pivot around it. Then add a small flex at the far edge of the door at the end of the swing: wooden doors have weight and they resist slightly at the end of their motion. That tiny flex at the full-open position makes the whole thing feel physically believable.
5. Book falling off a shelf
The most important frame in this exercise is the tipping point. The moment a book tips past its center of gravity, gravity takes over. But just before that moment, there’s a hesitation, a brief pause where the book is balanced on the edge of falling. Animate that hesitation. Give it 2 to 3 frames where the book is tilted but not yet committed to falling. The audience will feel the tension. Skip it and the book just falls, which is technically correct but emotionally flat.


6. A character taking a deep breath
Breathing involves more body parts than most people realize until they try to animate it. The ribcage expands, the shoulders rise, the belly moves outward on the inhale. And the exhale is slower than the inhale. Most beginners animate them at the same speed, which makes the breathing look like a loop rather than a deliberate breath. Try an 8-frame inhale and a 14-frame exhale. That ratio will feel immediately more natural. This is also a useful idle pose exercise for adding life to a standing character.
7. Waving flag
A flag wave starts at the pole and travels outward to the edge. The edge of the flag is always the last part to react. If you animate the whole flag moving at once, it looks like a stiff panel. The wave propagates from one end to the other, and there’s always a slight delay between where the wave is and where it started. Add variation to the wave speed: real flags don’t flap at a constant rhythm. Wind gusts, the fabric relaxes, the pattern changes. That variation makes it feel alive.


8. Melting ice cubes
Shape-morphing exercises teach you how to handle slow deformation over time. The ice cube should shrink unevenly, not just scale down uniformly. One corner might go first. A puddle forms under it as it melts. The surface changes from sharp-edged to rounded as the cube loses its form. This is a patience exercise: the motion is slow enough that timing errors are obvious. If your ice melts too fast or too uniformly, it reads as a scale animation, not a melt.
9. Sun rising
The sun doesn’t arc at a constant speed. It starts very slowly just above the horizon and picks up pace as it clears the lower atmosphere. Animate that speed variation: slow at the start, slightly faster once it’s in open sky. The background sky color should shift as it rises, from deep orange-red at the horizon to light blue overhead. If the sky is static while the sun moves, the whole scene loses coherence. This exercise forces you to manage two things at once: object movement and environmental color change.


10. Countdown
Countdown animations are a personality exercise disguised as a number sequence. Each digit enters with a different style: one drops in fast, the next eases in slowly, the one after that snaps. The easing between numbers changes how the whole sequence feels. Try a countdown where every number has a different entrance. Then try one where they’re all identical. The difference in engagement is significant. Easing is what separates animation that feels designed from animation that just plays back.
Simple animation ideas: Level 3 (Advanced)
Advanced exercises require you to track multiple moving systems simultaneously. A hand has 5 fingers that each move at slightly different times. A walking character has arms, legs, and a torso that all offset each other. The technical term for this is overlapping action, one of the 12 principles of animation originally developed by Disney animators Frank Thomas and Ollie Johnston. At this level, you’re not just making things move; you’re making them move in coordination. These are the character animation ideas hiring managers actually stop to watch.

1. Open hand closing into a fist
Five fingers don’t curl simultaneously. They close in a wave, usually starting with the pinky and rolling toward the index finger. That sequential overlap is what makes a fist feel controlled. If all of the fingers close all at once, it gives the feeling of a claw closing, not a hand closing. Try giving each finger a 2-frame delay relative to the one before it. The whole close might take 12 frames, but the overlapping timing across those 5 points of movement is what makes the hand read as human.
2. Hand picking up an object
The approach and the grasp are two separate motions with different energy. The hand slows as it nears the object, because the brain is directing precision movement. The fingers pre-shape into a grip before contact. The wrist rotates slightly to align with the object’s orientation. Then on the lift, the arm shows effort: a very slight upward stretch through the elbow and shoulder if the object has any weight. This exercise is about secondary motion in the wrist and the weight read in the arm.

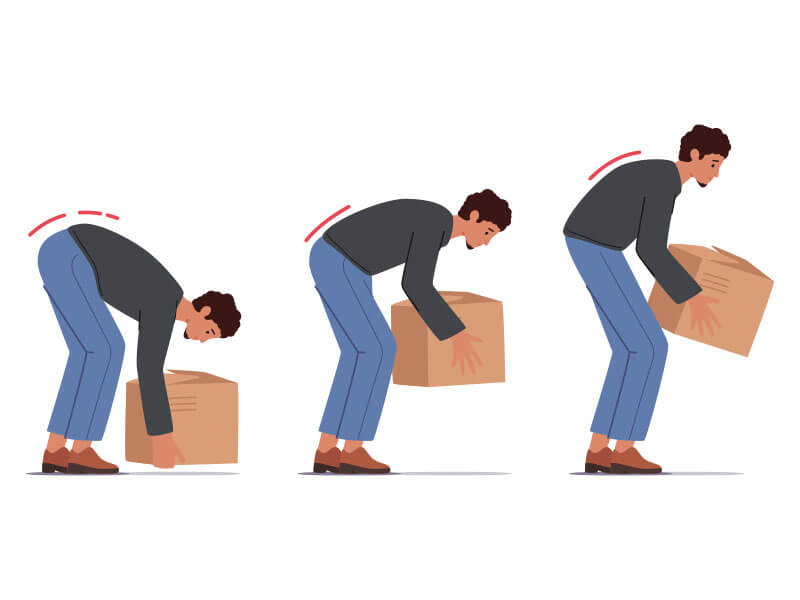
3. Lifting a heavy object with effort
Effort in animation has to be visible before the object moves. The spine curves forward, the knees bend, the center of gravity shifts low. Then the legs push up and the back straightens as the lift happens. If the character’s posture stays upright through the whole motion, the object looks weightless regardless of how slowly it moves. Animate the setup: show the body preparing to lift. That preparation is anticipation, and without it, the physics feel broken.
4. Overlapping action: arm swing while walking
A walk cycle is one of the hardest animations to get right. This exercise isolates just the arm swing, which is the most commonly wrong part. The arms lead the torso rotation: as the right foot goes forward, the left arm swings forward, but the torso rotation it creates happens a fraction of a second later. That offset between arm and torso is what gives a walk its sense of mass and momentum. Without it, the character looks like a stiff machine walking in perfect synchrony.


5. Character drawing or painting on a canvas
This combines fine motor hand movement with larger arm motion and adds a prop that has to respond to the contact. The brush follows the hand’s path, but the tip lags the handle slightly on direction changes. The wrist rotates on curves. And the canvas might shift very slightly under pressure if the character is pressing hard. This exercise forces you to coordinate 3 different motion systems at once: the arm path, the wrist rotation, and the brush’s response to both.
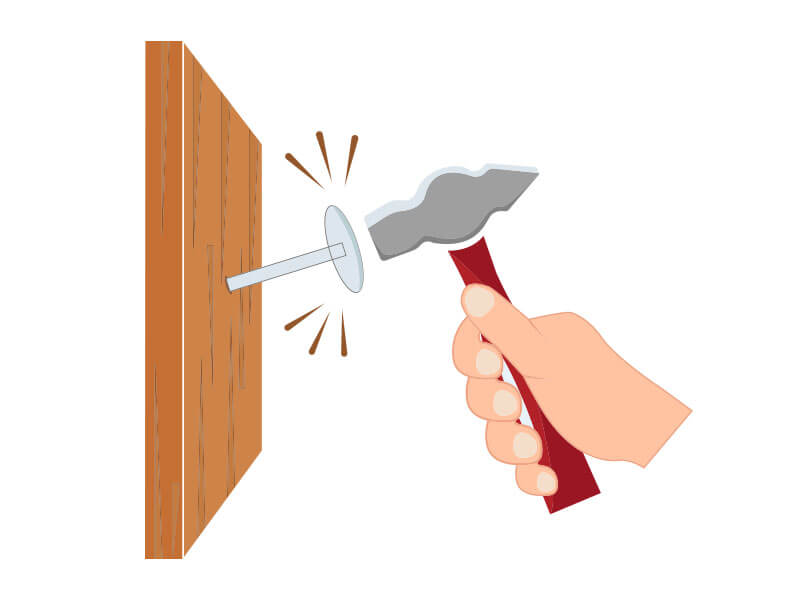
6. Hammering a nail into the wall
Impact animation has 2 distinct moments: the strike and the rebound. The hammer doesn’t stop dead on contact. It compresses slightly into the nail (or appears to) and then bounces back with diminishing energy, 2 to 3 small rebounds before coming to rest. Skip the rebound and the impact looks fake, like the hammer hit a pillow. The wind-up arc before the strike should be wide and fast. And the follow-through after the rebound settles should let the arm relax fully before the next swing.

7. Stirring ingredients while cooking
Circular motion with resistance. The spoon path slightly distorts on each stroke because the liquid pushes back. The bowl might shift fractionally if the stirring is vigorous. And the character’s elbow and shoulder follow the wrist’s circular path with a slight delay. This is an overlapping action exercise using a prop and environment. The interaction between the spoon, the bowl, and the character’s arm creates a small chain of cause and effect that has to be animated consistently from start to finish.
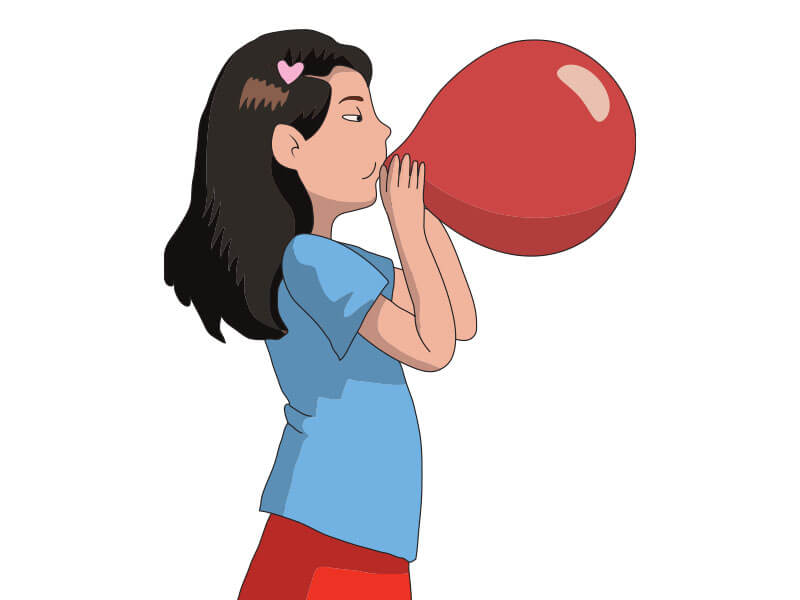
8. Blowing up a balloon
The balloon’s expansion is uneven: it doesn’t grow as a perfect sphere. The first few breaths inflate an irregular blob that gradually rounds out. The character’s cheeks puff, their neck shows slight strain on the exhale, and their posture changes as the balloon grows large. When the balloon gets big, the back-pressure increases and the character’s effort has to show that. Animate the exhale as a physical push, not just an open mouth. The strain is the story here.

9. Juggling multiple objects
Classic 3-ball juggling follows a very specific arc pattern: each ball follows the same high arc from one hand, peaks at the same height, and lands in the opposite hand on a downward curve. The 3 arcs are always in motion simultaneously and they can’t overlap in space. This means you’re tracking 3 separate trajectory paths that have to be timed precisely to each other. Tools like Adobe Animate have multi-layer guides that help track simultaneous paths. The discipline this exercise builds carries into any multi-element scene.
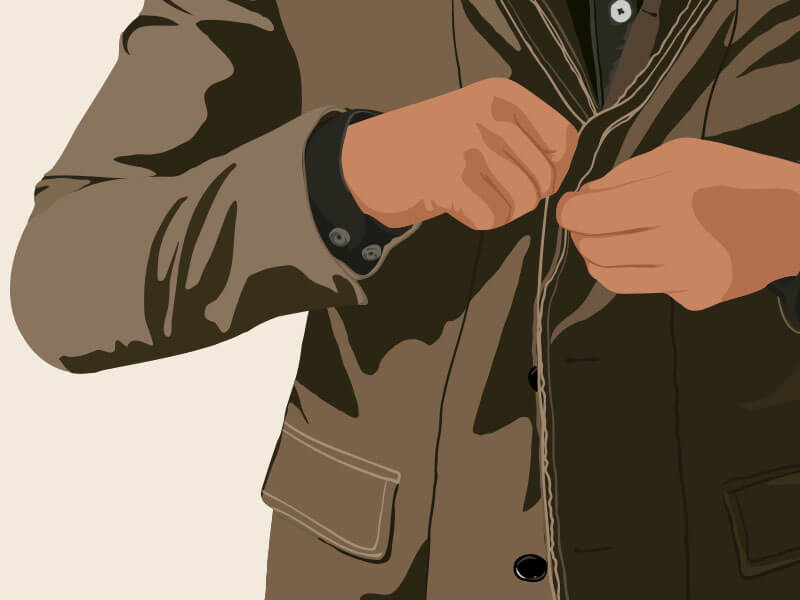
10. Zipping a jacket or putting on clothes
Clothing responds to the body’s movement, but it has its own weight and resistance. When a zipper is pulled up, the fabric on either side pinches inward slightly. When a sleeve is pushed up, the excess fabric bunches and then smooths. These fabric dynamics require you to animate the clothing as a secondary character with its own physics. The zipper pull has weight; it swings slightly after a fast pull. The jacket collar shifts when the shoulders move. Clothes are one of the most complex secondary motion problems in character animation. It’s one of the most advanced character animation ideas on this whole list.
Easy animation ideas: Level 4 (Expert)
Expert exercises are defined by one thing: multiple overlapping systems that all have to be physically believable simultaneously. At this level, the animations often involve environmental interaction, realistic physics simulation, or scene-level staging decisions. Getting 1 system right is craft. Getting 4 systems working together without any of them breaking is expertise. Plenty of these double as 3d animation ideas, since real physics is where 3d tools earn their keep.

1. Chewing food
Chewing involves more facial muscles than most animators anticipate. The jaw drops and moves slightly sideways on the chew, not just straight down. The cheek on the chewing side puffs slightly. The temple muscle flexes. The tongue moves inside (visible through the cheek surface). And the whole sequence ends with a swallow: the throat moves, the head might tilt back very slightly. This exercise will test how well you understand facial anatomy and how many simultaneous face deformations you can track without losing consistency.
2. Diving or swimming
Underwater physics are completely different from air movement. Water resistance slows limb movement at the extremes: a hand moving forward through water decelerates as it reaches full extension, much more than the same motion in air. The hair fans out and moves with a fluid delay. Bubbles trail behind fast-moving body parts. The body itself moves in a more undulating, full-spine motion rather than the segmented movement common in above-water animation. If you animate a swim cycle the same way you’d animate a run cycle, the underwater environment won’t read as credible.


3. Playing tug-of-war
Two-character coordination with a prop that has its own physics. The rope is the hardest part: it has to stay taut when both characters are pulling, go slack when one eases up, and whip when tension releases suddenly. Each character’s effort has to read independently; if both characters look identical in their straining poses, the scene loses drama. Animate each character’s weight shift, their foot plant, their shoulder and back strain. Then make sure the rope’s behavior is consistently responding to both of them at every frame.
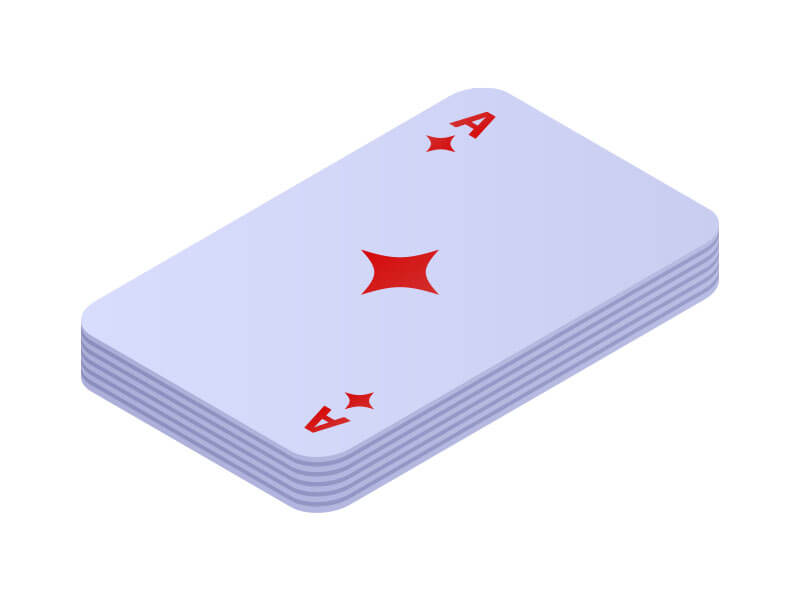
4. Dealing a deck of cards
Each card leaves the hand with a slight arc trajectory and a spin. The dealer’s wrist snap creates that spin; faster wrist, more rotation. As the cards land in a pile, each one slides slightly forward on impact before settling. The dealer’s arm motion is repetitive but not mechanical: each deal has a slightly different speed, force, and angle. This exercise requires fast, precise hand motion combined with prop physics (the cards) and a developing pile that changes shape with every card added.

5. Brushing teeth
Most beginners animate only the arm and brush. The expert version includes the head subtly resisting and following the brushing force, the cheek bulging and moving as the brush works inside the mouth, and the shoulders shifting with the arm movement. The neck muscles show slight tension when the brush reaches the back teeth. Add a foam buildup effect around the mouth at the mid-point. This exercise is a diagnostic for how thoroughly you think about secondary motion: every primary action has a secondary reaction somewhere in the body, and this one has several.
6. Falling feather
A falling feather is one of animation’s most demanding exercises in secondary motion. The feather rotates, drifts laterally, momentarily lifts on a subtle air current, then resumes its descent at a different angle. The path is never straight and never perfectly predictable. Speed variations are constant. The feather’s central spine curves slightly under air resistance. Tools like Blender’s particle systems can simulate this, but animating it by hand teaches you something no simulator can: you have to internalize what air resistance looks like as drawing decisions, not as math.


7. Aeroplane landing
This is a multi-system scene: airspeed deceleration, altitude descent, landing gear deployment, wheel touchdown with compression, wing flex under load, and reverse thrust animation. The touchdown moment requires the most care; the wheels compress the landing gear struts on contact, the fuselage tilts forward very slightly as weight transfers to the nose gear, and the engine nacelles show a slight rotation change as thrust reverses. Each of these systems needs to be timed correctly relative to the others. It’s one of the most complete hard-surface physics exercises available. It’s a favorite among 3d animation ideas for that reason.
8. Taking photos
The physical act of taking a photo has more animation content than it appears. The camera raises to eye level, the frame is adjusted with a slight tilt of the wrists, there’s a moment of held breath and stillness before the shutter press, the index finger depresses, and the body shows a very small recoil on the click. The anticipation pause before the shot is the most important frame in the sequence. A character who just raises a camera and presses a button without that pre-shot stillness looks like they don’t care about the photo.


9. Teaching students on a blackboard
This is primarily a staging and scene composition exercise. The character writes on the board, but their body needs to stay partially turned toward the audience; a teacher who faces the board completely loses the visual connection with the class. The head turns between board and students. The arm writing on the board uses a different energy from the arm gesturing to the class. The character’s weight shifts as they move along the board. This requires you to make scene-level decisions about sightlines, camera angle, and spatial relationships that most single-character exercises don’t involve.
10. Turning on a torch light in a dark room
The real challenge here isn’t the hand motion. It’s the light change. As the torch activates and moves, the entire scene’s lighting shifts in real time. Objects near the beam edge go from dark to lit to dark as the torch sweeps. The character’s own face shows the moving light source. Shadows change direction. This is a combined motion and lighting exercise that requires you to think about the torch’s cone of light as its own animated object with volume, direction, and falloff that all have to stay consistent with where the torch is pointing at every frame.

1 minute animation ideas
A 1-minute animation is a different kind of challenge. Level 1 through 4 exercises are about mastering movement. A 1-minute piece requires you to tell a story with that movement. You need a setup (something to care about), a conflict (something that changes), and a payoff (a moment of resolution or surprise). At 24 frames per second, you have 1,440 frames. Every one of them has to earn its place. These short animation ideas pack a setup, a conflict, and a payoff into 60 seconds, and the best 1 minute animation ideas make every frame count.

1. Lost and found story
A character realizes something is missing. The panic builds through escalating search behavior: first calm checking, then frantic searching, then despair. They find it in the most obvious place possible, somewhere they checked at the start. The payoff is the shift from despair to embarrassed relief. The animation challenge is conveying all of this without dialogue or text. The character’s body language has to be specific enough that the emotional sequence reads clearly to someone watching with no context. This is pure pantomime acting.
2. Morning chaos
An alarm goes off. The character oversleeps, realizes it, and then tries to do 4 things simultaneously: eat, dress, brush teeth, grab keys. The humor and tension come from overlapping action, multiple things happening at once that are each independently animated but have to coexist in the same frame. This is technically one of the hardest 1-minute formats because it requires you to manage what is essentially a multi-character timing problem inside a single character’s body. The chaos only reads as intentional if each individual action is still clean.

3. Character revealing
A silhouette. Still. Then color bleeds in from one corner, slowly filling the figure. Details emerge: texture, features, personality details in the design. The character becomes real over 60 seconds. The pacing is everything here: the reveal should create anticipation, not just play back. Accelerate the fill slightly as the character becomes more defined. Add a small reaction animation at the end, the character blinks, shifts their weight, looks around. That final movement is the payoff: the moment they stop being a shape and become a person.
4. Unexpected rain
A still, sunny scene. One raindrop lands on a dry surface. Then a handful. Then a downpour in seconds. A character who was doing something normal has to react. The animation challenge is the rain system itself: rain in animation requires particles moving at consistent angles, splash impacts on surfaces, and an environmental response (puddles, wet surfaces, character’s wet hair and clothes). The character reaction has to happen realistically relative to the rain density, not all at once before the rain has fully started.


5. Mini cooking disaster
The setup is calm and methodical: a character cooking something with care. One small mistake starts a chain reaction, an ingredient added in the wrong order, a flame too high, a split-second distraction. The disaster escalates faster than the character can respond. The structure is PAS (Problem, Amplification, Stakes): each beat of the disaster has to be worse than the last, and the character’s response has to lag behind each new development by just enough to feel real. The comedy, or tragedy, lives in the gap between the disaster and the character’s awareness of it.
6. Lost keys chaos
A character is late. They need their keys. Every place they check is wrong. The search escalates in desperation: first methodical, then increasingly frantic, then total dissolution of organized thought. The keys are in their pocket the whole time. The payoff is the hand that goes reflexively to the pocket, the pause, the keys appearing. This is an exercise in escalating internal state communicated through body language without dialogue. The character’s movement should get more disorganized as the frustration peaks. Controlled early, chaotic at the midpoint, still at the discovery.


7. Coffee spill in a cafe
Full coffee cup. Character distracted by something across the room. Slow-motion awareness that the cup is tipping. Too late. The spill. The fluid dynamics of coffee leaving a cup and hitting a surface are genuinely complex: the arc of the liquid, the impact splash, the spread pattern on the table surface. After the spill, the character freezes. That freeze is the most important moment in the piece: it’s the gap between action and reaction, and how long it lasts determines whether the piece reads as comedy or catastrophe.
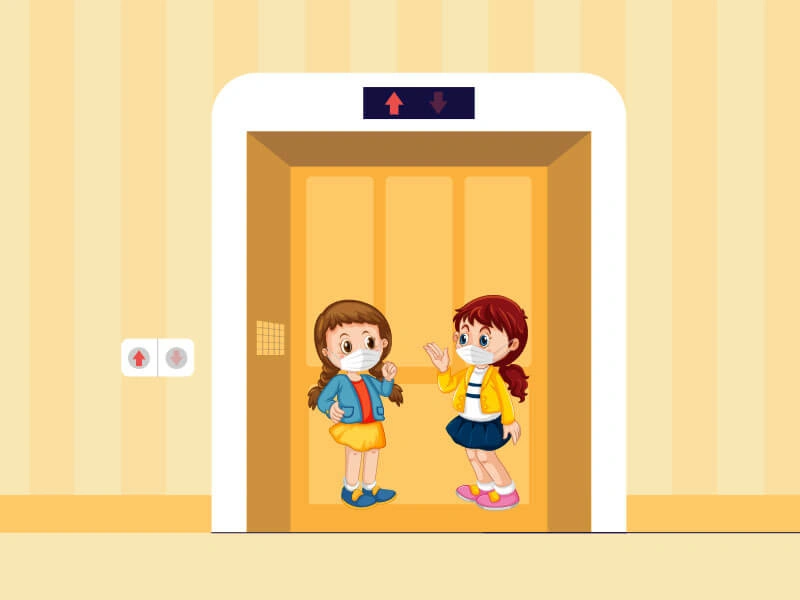
8. Elevator awkwardness
Two strangers. A small elevator. 30 seconds of shared space before one gets off. No action happens in this piece; the entire animation is micro-expression and body language. A glance that goes too long. Eyes quickly redirected to the floor counter. A slight shift in weight away from the other person. One does something inadvertently strange: a noise, an accidental touch of a shoulder, an involuntary hum. The other responds. This is one of the purest acting exercises in animation because the constraint (nothing dramatic can happen) forces all the storytelling into tiny physical specifics.

9. Playful cat making disasters
A cat alone in a room. Unhurried. It approaches a shelf object, makes deliberate eye contact with an imaginary observer, and pushes it off the edge. Pause. Approaches another object. Same thing. Cat movement has a specific physical vocabulary: the coiled stillness before action, the paw test before committing, the sudden spring-loaded burst of movement, and the immediate return to casual indifference after. Get the cat’s weight and spring physics wrong and it looks like a fuzzy rectangle sliding around a scene. Get it right and it’s immediately recognizable.
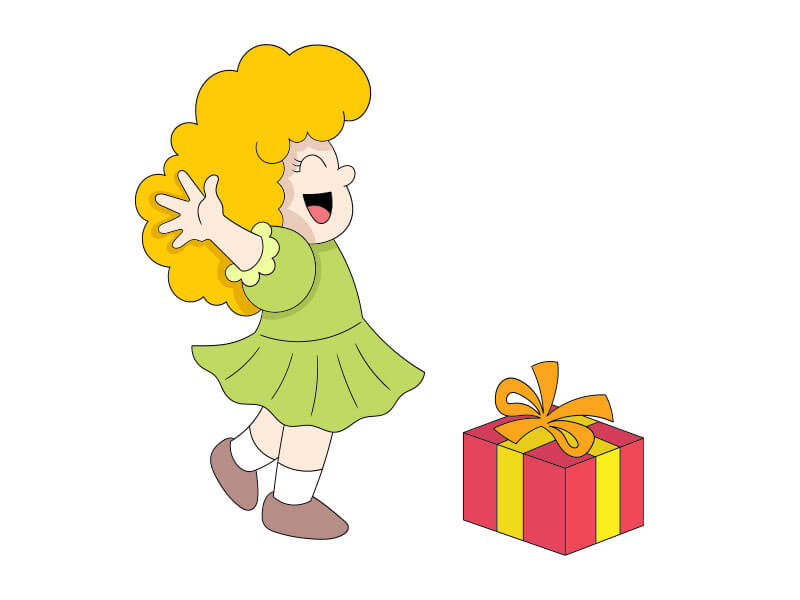
10. Gift surprise
A character receives an unexpected gift. The box is opened slowly, not knowing what’s inside. The reaction builds from curious to confused to delighted, or confused to horrified, or something stranger. The emotional journey across those 3 states is the entire animation challenge. Each transition between expressions needs real timing work: rush the shift from confused to delighted and it reads as fake enthusiasm. Sit in the confusion too long and the piece loses momentum. The right duration for each emotional state is the puzzle, and solving it requires you to feel the scene as a viewer, not just build it as a technician.
FAQs: easy animation ideas
FlipaClip and Rough Animator work well on tablets for frame-by-frame practice. Adobe Animate suits beginners moving into timeline-based work. Blender is free and handles 2D and 3D. For physical practice, any flip note pad works. The best tool is the one you'll actually open and use consistently. Stop motion animation ideas need almost nothing either: a phone, a tripod, and an app like Stop Motion Studio. Some people search for these as stop animation ideas, but it's the same craft.
They isolate one principle per exercise. A bouncing ball teaches timing without requiring character design. A falling leaf teaches secondary motion without the complexity of a full scene. Practicing targeted exercises builds a skill library you can draw on when projects get complex. Progress compounds faster through focused repetition than through ambitious projects that fail for 5 reasons at once. That's especially true for 2d animation ideas, where one clean exercise teaches more than a messy scene.
Blinking eyes, a character thinking, and a smiling face are clean starting points at Level 1. For intermediate work, a sneezing character or deep breath exercise introduces body mechanics. The progression matters: build facial expression first, then add body involvement, then layer secondary motion. Jumping straight to a full walk cycle before mastering a blink usually produces a walk that looks wrong for reasons you can't identify. These are the animation ideas for beginners that pay off fastest.
Flipbook animation ideas, bouncing balls, and falling objects are the standard starting 3 in 2D. They require no character design and can be done in any 2D software. Stick figures work fine for jump and walk exercises. The goal at the beginner stage is to understand timing and spacing, not to produce polished character work. Plain shapes animated cleanly teach more than detailed characters animated badly. Stop motion animation ideas live here too, alongside flipbook animation ideas, and beginners often search them as stop animation ideas before they learn the proper term.
In 3D, the bouncing ball is still the universal first exercise. Blender includes beginner-friendly tutorials that walk through it step by step. After the ball, try a falling cube (introduces 3D rotation and impact) and then a simple pendulum swing. These 3 exercises cover timing, weight, and follow-through, the core physics principles that every 3D animation relies on regardless of complexity. Start with these 3d animation ideas before you touch rigging or simulation.
Simple animation ideas: conclusion
The list you just read is a progression, not a menu. A finished Level 1 exercise beats an abandoned Level 4 attempt every time. Pick the level that matches where you are right now, complete one idea from it, and watch what you learn. The next idea will be easier because the last one built something real. Whether you stick to 2d animation ideas or move into 3d, the path is the same: one finished exercise at a time. And the short animation ideas at the end, those 1 minute animation ideas, will be waiting when you’re ready. Need professional medical animation services for your practice? Contact Mediverticals.
ITVerticals Services

Proven Local SEO Strategies That Work in 2026
Adam Romy
June 8, 2026

How to Create a Landing Page That Actually Converts in 2026
Adam Romy
June 1, 2026

Top 10 SEM/PPC Strategies for Better ROI in 2026
Adam Romy
May 25, 2026

Mobile App Development Cost: What You Need to Know in 2026
Adam Romy
May 18, 2026
50+ Easy Animation Ideas from Beginners to Experts
Adam Romy
June 15, 2026
Proven Local SEO Strategies That Work in 2026
Adam Romy
June 8, 2026
How to Create a Landing Page That Actually Converts in 2026
Adam Romy
June 1, 2026
Top 10 SEM/PPC Strategies for Better ROI in 2026
Adam Romy
May 25, 2026
Mobile App Development Cost: What You Need to Know in 2026
Adam Romy
May 18, 2026
